Contents
This latest method, you’ll help in the FRP ASUS Zenfone 4 shelf to bypass, and also many other ASUS Zenfone Android 7.1.1 devices in this method, we simply Install the new Google Account through the “Google Play services” application In case you can add, follow all steps carefully. Each phase has been described very well. This method is only for the device.

Note: This method has been successfully implemented on ASUS Zenfonee 4 Selfie, Android 7.1.1.
Let’s start bypassing the FRP ASUS Zenfonee 4 Selfie:
Connect your Wi-Fi first to your device.
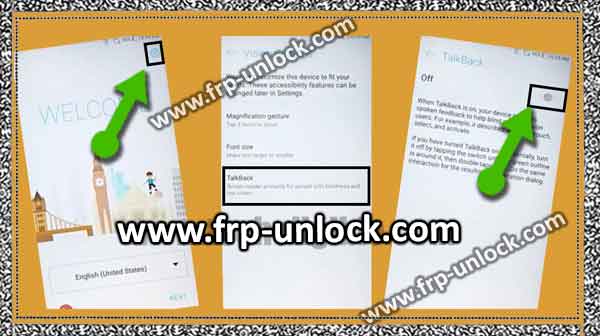
Step: First go back to “Welcome Screen” Tap on “Settings, icon” from the upper right corner.
Step: After that, tap the “ok” talkback after that tap and then turn it on.BypassFRP ASUS Zenfone 4 self ASUS Jenfon FRP Bypass Unlock Asus Zefnone Self, Bypass Zenfone 4 Selfie FRP, Bypass ASUS Zenfone Android Google Account 7.1.1
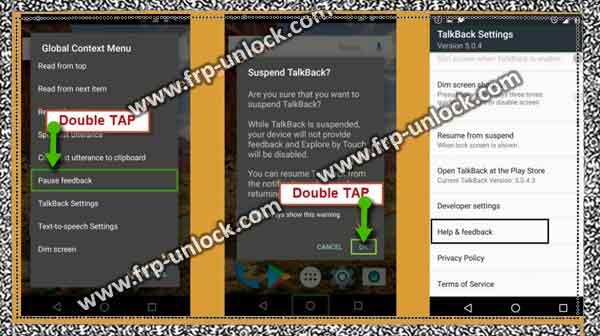
Step: Now, you’ll have a “Talkback Tutorial” screen. Draw “L” on your screen to bring Global “Global Context Menu” Tap double tap ” Talkback Settings,” from the global context menu.
Step: Once you enter the ” Talkback Settings,” screen, Now, we need to disable TalkBack. Disable your Talkback feature, by pressing both (Volume UP + Volume Down) key simultaneously. After pressing Volume Keys, you’ll get a Pop-up of “Suspend Talkback”, just tap “ok”.
Step: Go to “Help & Feedback”, and then tap “About switch access to Android”. BypassFRP ASUS Zenfone 4 self ASUS Jenfon FRP Bypass Unlock Asus Zefnone Self, Bypass Zenfone 4 Selfie FRP, Bypass ASUS Zenfone Android Google Account 7.1.1
Step: Now, you’ll have “youtube video” on your screen. You just tap the “Play icon” on the YouTube video, and wait for a few seconds until you receive the “YouTube Video Title”.
Step: After that, you’ll be able to see the “YouTube video title”, just tap the title “Switch Access to Android”. BypassFRP ASUS Zenfone 4 self ASUS Jenfon FRP Bypass Unlock Asus Zefnone Self, Bypass Zenfone 4 Selfie FRP, Bypass ASUS Zenfone Android Google Account 7.1.1
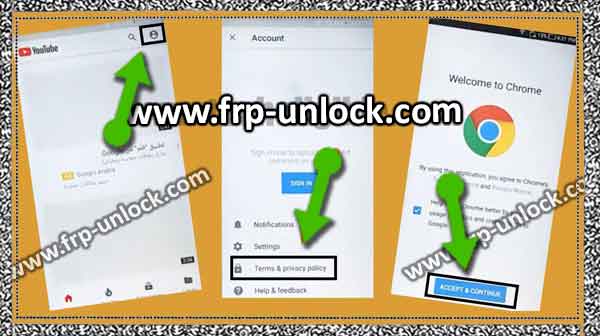
Step: you’ll Now, be redirected to “YouTube page”. Drag YouTube videos, and then tap “3 dots” or “profile image” from the upper right corner.Tap “Terms and privacy” to the Terms.
Step: Now you’ll be redirected to Chrome browser. BypassFRP ASUS Zenfone 4 self ASUS Jenfon FRP Bypass Unlock Asus Zefnone Self, Bypass Zenfone 4 Selfie FRP, Bypass ASUS Zenfone Android Google Account 7.1.1
Step: Tap ➔ Accept and continue ➔ Next ➔ No thanks.
Download Zenfone Frap Bypass Tool:
Type in the Search Bar “Pangu Download the Frap Tools”.
Step: After that you’ll find the “download frame tools” page on your first search result, just tap it.Scroll down and download from the Google Play Services app.
Step: Once you’ve successfully downloaded the Google Play Services app, you need to download another app.Download the “Go Launcher” app.
Wait till downloading the Finnish, after that you have a Pop-up bottom of your screen, just tap “Open” from that Pop-up.
Step: Now, you’ll get another Pop-up on your screen, it’s about “security“, just tap “Settings,” from that Pop-up.
Step: Now, enable “unknown sources” from there. Go back to “Download Page”, and then go back to “Go Launcher Z”.
Step: Now, after the “open” tap on the Pop-up, wait till downloading the finish. To Install the Go “Go Launcher” app, you need to open ➔ Next ➔ Installs.
Step: Congratulations, you’ve successfully launched “Go Launcher” Launcha and you’ve access to your device “Home Screen”.
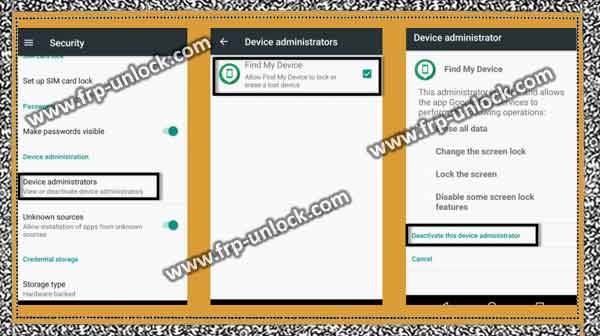
Step: Now, we’ve to disable “Device Administrator”, follow the steps below.
Step: Settings, ➔ security ➔ ➔ Device Administrator ➔ Go to my device ➔ Disable this device administrator. BypassFRP ASUS Zenfone 4 self ASUS Jenfon FRP Bypass Unlock Asus Zefnone Self, Bypass Zenfone 4 Selfie FRP, Bypass ASUS Zenfone Android Google Account 7.1.1
Google Acc Manager + Disable Google Play services:
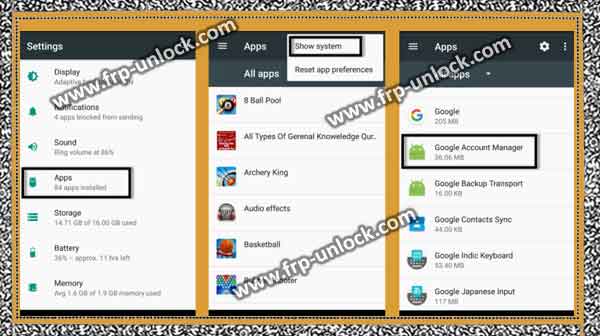
Step: Back to Settings, ➔ app On ‘3 is taped
Step: “from the upper right corner, then select” Show system “.
Step: we’re going to clear the data and disabling Google Account Manager.
Step: Google Account Manager ➔ ➔ Storage Go to Clear Data ➔ ok. BypassFRP ASUS Zenfone 4 self ASUS Jenfon FRP Bypass Unlock Asus Zefnone Self, Bypass Zenfone 4 Selfie FRP, Bypass ASUS Zenfone Android Google Account 7.1.1 “Tap” Back “from the top left the corner.
Step: Now, tap the “disabled” button to disable Google Account Manager. Return to the app to disable Play Google play services. Go to Google Play Services ➔ ➔ ➔ Storage space ➔ Clear data managed ➔ ok.
Step: Tap is “back arrow” in the left corner. Now, tap the Google service application “disabled” button to disable it.
Install Google Play services app:
Go to “Folder Download”. Tap on your downloaded APK file for Play Google Play services. ➔ Install ➔ Next ➔ after Tap Tap. Add new Gmail ID to BypassFRP ASUS Zenfone 4 Self: Go to “Settings,“.
Step: Then, select Account ➔ to Add Account ➔ and go to “Google.” Sign up with any valid ID for your Gmail BypassFRP ASUS Zenfone 4 self. After that, by going to Settings, ➔ Apps, you enable the application (manage Google account + Google Play service). Restart your device. Full initial setup to access the ASUS Zenfonee home screen.
Step: unInstall Now, Install the “Google Play services” app that you first bypass that FRP ASUS Zenfone 4 self.
Congratulations, you’ve successfully ignored Google account from your device ASUS Zenfone. Thanks for watching us.
Sharing is caringSo, Share it on Social Media
